Shake that bootie, baby!
Posted: 15 August 2013 Filed under: Handmade | Tags: baby, bootie, booties, ithinksew, kimono, Sue Kim Leave a comment
The first pair of baby booties I ever made were for Chloe (see here for picture) from the “Teeny-tiny goody two-shoes” pattern in Meet Me at Mikes by Pip Lincolne. A bit fiddly to make but soooo worth it! So when my friend and office-buddy Olivia’s maternity leave was approaching I really wanted to give her something similar, but with a personal twist.
Step forward these Kimono-style Baby Booties. I love how this design gives a nod to Olivia’s time living in Asia (admittedly I know now that kimonos hail from Japan and she was in Hong Kong but hey, I tried!) The pattern is “Michi” by Sue Kim and you can buy it as a PDF from her Etsy shop or her website, ithinksew.com.
Olivia had already said that she liked blue and wasn’t into the whole pink for girls thing so I looked around and found this fabric on Ebay. I love the tiny flowers and gold detailing, and if I was doing it again I might even have cut it so they had matching fans on each opposite toe – how cute?! The inner is leftover fabric from the Cool and Awesome cushions.

Like the “two-shoes” pattern, it is a bit fiddly but the instructions were pretty clear and I really love how it doesn’t have any rough seams on the inside of the shoe. Its important to make sure you cut and mark your pattern carefully though, otherwise you end up with one a bit bigger than the other (oops!)
It was my first venture into buying pattern PDFs from the internet and I’m really pleased with the results. If you like the design but prefer craft books then check out Sue Kim’s Bags: The Modern Classics and the forthcoming Baby Boutique.
Meet the Maker: SquiffyDesigns
Posted: 24 May 2013 Filed under: Handmade | Tags: Etsy, Scandinavian, SquiffyDesigns, vintage 2 Comments
As I mentioned in my last post, I recently bought a beautiful dress for Chloe from Ulrika and Hugh of SquiffyDesigns. This husband and wife team sell original Scandinavian vintage items and also make beautiful children’s clothes and homewares from their vintage fabric stash. Having been inspired by their endeavours since I met them in Scotland last year, I am thrilled to introduce them to you in this Meet the Maker interview:

Can you tell me a little about yourselves and your backgrounds?
We live together in Glasgow, Scotland with our three year old daughter Astrid, and two cats.
Ulrika is predominantly Swedish but is becoming more British every day (i.e. she is getting worse at plumbing and doesn’t bother taking her shoes off in the house so much). She is from the northern part of Sweden (Norrland) and is therefore quite hard. She has an interest in politics, and has previously worked and studied in this field.
Hugh was brought up in Scotland but also lived in Cornwall and Somerset as a child. His background involves lots of stuff but he recently settled in medical imaging, and is currently working as a radiographer and sonographer.
When we met, around eight years ago, we discovered a shared interest in handcraft, which has turned into a love. Hugh has nurtured an interest in stenciling and printing, and has recently started practising some cutting and sewing. Ulrika has mastered many skills and enjoys cutting and sewing patterns, crocheting clothes and objects, and many other crafts.
We hope one day to work more closely together: designing and printing our own fabric, probably vintage inspired, and making finished items from the cloth we produce.

Have you always made things?
Ulrika: No. I come from a family who were very creative – but in a very unassuming way. My mother sewed, knitted and painted both as a hobby and as a necessity. She was also very good with coming up with unconventional solutions to problems, mainly because we couldn’t always afford the conventional solution. As I remember, it was very much in a “make do and mend” spirit.
My father would also probably not call himself creative – he first worked as a mechanic and then as a farmer. However, in both those lines of work I saw him using his hands and trying to come up with solutions, again mainly using the means he had at hand. Looking back at it now I think it instilled a thought that things don’t have to be the way they are, you can look for other ways of doing them – which is what creativeness is to me really.
I, on the other hand, had one of my worst grades at school when it came to sewing/handcrafts (in Sweden you did both textiles and woodwork as part of the ordinary curriculum) and barely scraped by! I felt as if I was rebelling against old traditions and what women were supposed to be and know. But then I had friends who were doing all sort of crazy things (in my eyes), like knitting their own sweaters even though they weren’t grannies! And I thought, “That is cool, I want to do that too!” So I made a pair of pea green trousers out of an old curtain and they turned out okay. I even wore them out!
Now I would like to say that after that there was nothing stopping me and I just started making things all the time, but no. I dipped in and out of it for many years, and tried quite a lot of crafts but none really seriously.
It wasn’t until I stumbled upon the rising DIY movement on the internet and saw all the wonderful creations that people were making that I really got inspired and wanted to do something similar. Funnily enough it was seeing a picture of some Amigurumi that triggered me. I remember thinking, “That is so cool, I want to do that too! Hey, I’ve crocheted before, I CAN do it!” And after that I’ve been doing it more and more seriously; reading craft books, craft blogs, tutorials, and of course experimenting with my own things.
Hugh: A bit like Ulrika, I grew up with a mother who was able to make clothes and items as a matter of course but I perhaps didn’t appreciate how cool this stuff was until more recently. Although I do remember being especially proud of a green corduroy school bag which I was furnished with on my first day of junior school.
I have made things since I was a teenager, but my efforts mainly concentrated on music and pieces of stone, as an amateur sound engineer and a stonemason, until about 10 years ago. I went to a Aphex Twin concert and was disappointed not to be able to buy a t-shirt with the infamous logo on it, so I decided to make my own. So, with a basic understanding of stencilling I embarked on my craft career, making an Aphex Twin logo t-shirt which I wore proudly from then on. I have since honed my art and can make basic screen prints from most art/photography.

How did SquiffyDesigns come about?
Our daughter made us do it! When we were expecting her, both Hugh and I were working jobs that we enjoyed but we weren’t as creative as we would want to be. Having a child coming along, we felt an urgency to set as good an example for her as possible, so we had a discussion about what we would really like to do if we had all the possibilities in the world. We had talked about wanting to make things with our hands for a living before, but we’d always “seen sense” and stuck to the safe option i.e. our day jobs. But thinking of our wee one, we both felt that we wouldn’t like her to take the safe option in life; we wanted her to go for what she really wanted and to be happy. So we felt we needed to be good role models for her and took the leap (a small one but a leap nevertheless) and decided to start up a business. Our daughter’s nickname when she was in my tummy was Squiffy, so we named the business SquiffyDesigns in her honour.
You use predominantly Scandinavian vintage fabrics – what do you look for when choosing fabric for your designs?
Fabrics that I grew up with, the things that I remember from my grandparents house etc. It can be a pattern, or a colour. Or something from a Carl Larsson painting.
We always go to second-hand and vintage shops when we are in Sweden; you can find so many beautiful things.
Where do you make your creations?
All of our stuff is made in our house, mostly in our second bedroom which is pretty much a full-time craft room, but doubles as a guest bedroom. No cats allowed.

I know that you both have day jobs and are also parents. How do you balance work, parenting, creating things, and running a business?
With some difficulty, as you may appreciate. The hardest thing is making sure Astrid gets enough attention. She doesn’t understand that it’s not safe/practical for her to be involved in every stage of the creative process, so making sure she doesn’t feel neglected takes priority. I (Hugh) am also studying for a Postgraduate Diploma, so I have taken a bit of a step back from crafting for while. I’ll be finished soon though, so I hope to be properly back in business in the near future.
What do you love most about being designer/makers?
Holding something beautiful in my hand and knowing that it was made by me!
Who or what inspires you?
Our main inspiration is our daughter. A lot of the stuff we make is inspired by the stages she is going through as she grows up. Again, Scandinavian textile design hugely influences the designs we make: clean and simple. We also love Japanese design, which always seems to surprise and delight us.
Where do you see SquiffyDesigns in 5 years time?
Bigger and bolder and rougher and tougher. No, but seriously, we would like to invest in learning more skills, and getting a proper studio space with access to equipment which would allow us to complete the process of making our own fabric. In five years hopefully we will be doing that.
Have you any tips for people who want to follow in your footsteps?
Ars longa, vita brevis. Don’t hang around. The Crafts Council reckons it takes 10,000 hours to learn a craft, so start now. I’m pretty sure you don’t need 10,000 hours to do the stuff we do, but if you enjoy what you’re doing, get stuck in!
Are there any other designer/makers that you recommend I check out?
I find so many beautiful, smart, funny things being made by other people almost on a daily basis, but three of my favourite craft related bloggers are:
Posie Gets Cozy: She makes the most beautiful things and seems to be a dab hand at anything she tries, be it sewing, embroidery, or knitting. She also writes in a fantastically beautiful way that is just so inspiring!
Bookhou: She makes very minimal, very aesthetically pleasing items that I would just love to fill my home with.
Aunty Cookie: Her art/craft aside, she is the funniest writer on the block. Sharp and cynical. A delight to read.

Big thanks to Ulrika and Hugh for sharing their story with me!
To find out more, you can find SquiffyDesigns in the following places:
Chloe’s birthday – cakes and crafts
Posted: 21 May 2013 Filed under: Handmade, Homemade | Tags: Fairy party, mini doughnuts, SquiffyDesigns 4 Comments
So as of last week, Chloe is 4. How did that happen?! She’s growing so fast and with every year she gets more clever, funny, imaginative, strong, and adventurous.
Celebrations began on the day itself with pancakes and the unwrapping of her first pedal bike – so exciting! I know its not handmade but I have to just draw your attention to the brilliance of the Apollo Pixie – it has rainbows on the seat and a toadstool storage box on the back – so cool!
The other present I got her was the gorgeous dress pictured above, handmade by SquiffyDesigns. Here it is from the back:

I met Ulrika and Hugh of SquiffyDesigns at Katie and Nico’s wedding and was immediately taken by Ulrika’s handmade dress. I’ve really enjoyed following the growth of their business via their Facebook page and Etsy shop and Chloe’s birthday seemed the perfect opportunity to treat her to one of their lovely children’s dresses (all made from vintage Scandinavian fabrics). When they heard that it was a present for Chloe’s birthday they sent her one of their gorgeous bags too, how lovely is that? If you like their work then watch this space as they have very kindly agreed to be featured in a Meet the Maker article on this blog – coming soon!

The other noteworthy thing we did on her birthday was a trip to see the Elves and the Shoemaker at the Tobacco Factory Theatre. It was a show by the Stuff and Nonsense Theatre Company who describe themselves as making theatre “out of anything! Musical instruments, old tools, bits of shiny paper- we mix it all up with a big splodge of imagination, cook it for two months and hey presto, we get a show!” It was an utterly magical performance; we were all transfixed. Follow this link to see the trailer and if you get the chance to go, do!
Carrying on with the pixie/elf theme, Chloe requested a fairy party for her and some of her preschool friends, so on Saturday I had 7 little girls sitting around the table getting covered in glitter as they made fairy crowns and wands:

I got the blank crowns and wands from the kids craft websites www.kidzcraft.co.uk and www.craftycapers.co.uk, as well as a whole bunch of feathers, pom poms, glitter and stickers. I don’t know which of us was more excited as the parcels of crafty joy started arriving in the weeks before the party!
Obviously snacks were needed for the mums and dads so I made some mini doughnuts to keep us going:

I discovered the concept of a homemade baked doughnut on the That Kate blog (she posts a vegan recipe) – what genius! I HAD to try a wheat-free version so got this tin and used the accompanying recipe but substituting my fave Doves Farm gluten free flour for wheat flour. They are more cakey than fried doughnuts and don’t have loads of flavour on their own, but when dipped in either vanilla sugar or a caster sugar/cinnamon combo, they are lush!
And of course there was a themed birthday cake:

I have to confess that while the cake was homemade (using the Victoria Sponge recipe from Red Velvet and Chocolate Heartache), I did buy the decorations,but I’m so glad I did – how cute are they?! The fairy was from here and the flowers and toadstools were from here.
We also did a family bring and share lunch on the Sunday – unfortunately there are no photos as it all got scoffed but I can assure you that it was a wonderful homemade feast!
A note on presents – I asked for Chloe’s preschool party to be a “no presents” party as she already has so many toys. What she did get was some supercute cards, including some handmade by her preschool friends:


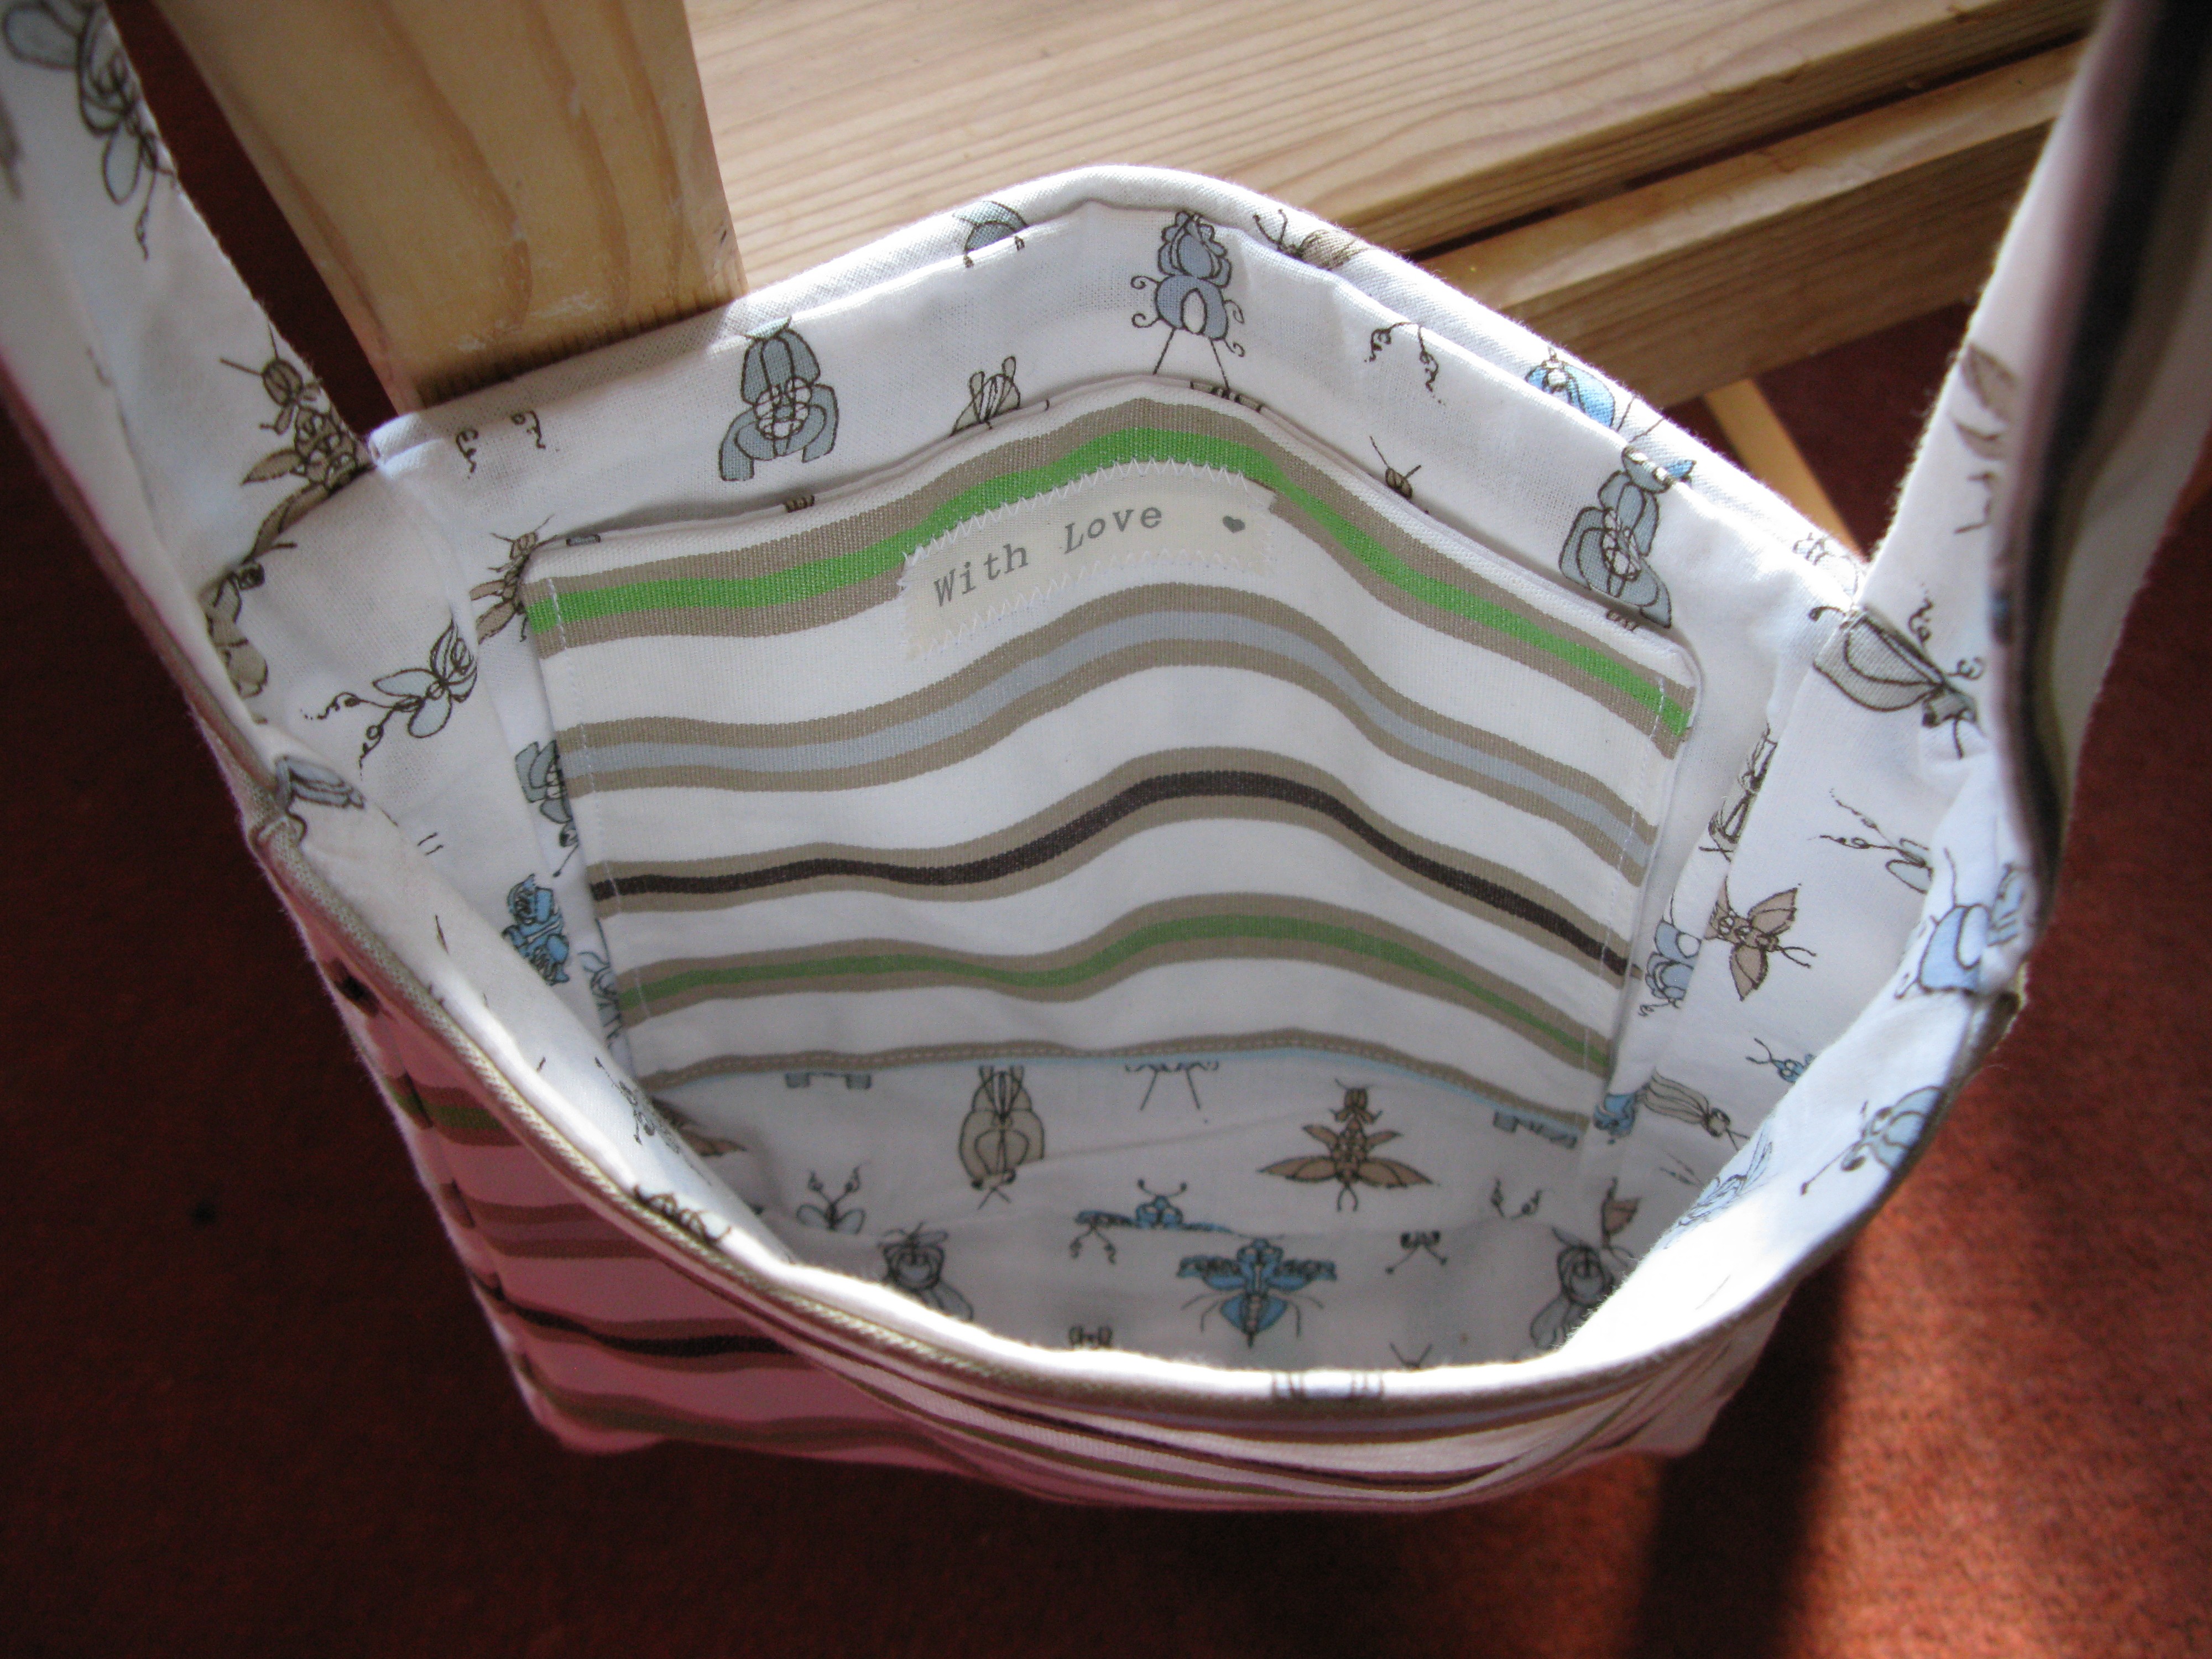
Ironically Chloe told me that her favourite bit about her birthday parties was getting presents, and so I can’t finish without showing you the brilliant handmade card and bag which Lorraine and Tilly gave her:

Even the inside is decorated, with each flag of the bunting cut out separately by Lorraine, and illustrations by Tilly:

And the bag goes with the fairyland theme!

What a lucky girl! And we’re both lucky to have so many talented makers in our lives – thanks all!
Patchwork quilt
Posted: 12 May 2013 Filed under: Handmade, Other creative shenanigans | Tags: quilt, sewing, Sutton Court Farm, The Great British Sewing Bee Leave a comment
I am becoming a bit of a sewing geek. Last winter I decided I wanted to improve my sewing skills so I started doing a bit of research and trialled drawing up my own skirt pattern, as well as making the Cool and Awesome cushions. Since then, I’ve upgraded my sewing machine, done a pattern cutting course, and am working on a couple of dressmaking projects (to be blogged about over the coming months!) And of course, I followed The Great British Sewing Bee avidly, whose talented contestants inspired me even further.
The unexpected side effect is that I’ve become fascinated by how things are sewn and when I found the beautiful quilt above while on holiday recently I was captivated. I love the colours and the funky retro fabrics:

I love the way the edges of the hexagons stick out like bunting at the ends of the quilt:

But the really wonderful thing about this quilt is that its handstitched. That’s right, every single one of those hexagons, and all the finishing has been done by hand:

What an incredible labour of love! And what’s more, there was not just one, but three of them in the cottage we were staying in. The owner said that they were made by his mum, and that they’re nearing the end of their useable life. I’ve half a mind to ask him if I can have them when he’s done…
NB: I realise that quilts are usually ON the bed rather than hanging off the side, but as we were in a bunk bed the temptation to turn it into a den to clamber in and out of was irresistable:

PS: We stayed in Hazelnut, one of the six cottages at Sutton Court Farm in Shropshire. Big thanks to Charlie for organising the holiday 🙂
Personalised pasties
Posted: 23 April 2013 Filed under: Homemade | Tags: alphabet cutters, Delicious magazine, DS-gluten free, gluten free, pastry, pasty, ricotta, spinach, vegetarian 2 Comments
Last autumn I treated myself to some alphabet pastry cutters. They are SO COOL! I mean, pastry is pretty brilliant anyway, especially if you’re gluten-free, when it becomes a rare and much appreciated treat. But pastry with letters on? Well, that’s a whole new level of awesomeness! So when I had some friends round for lunch last month I started with the pastry cutters and worked out the main course from there, settling on personalised Vegetable and Ricotta Pasties.
For the filling, I used this super-easy recipe from Delicious magazine. I love spinach and ricotta anyway, but combining it with sweet, tangy ratatouille was new to me and it worked well. The pastry was DS gluten free shortcrust pastry, which has become a real favourite of mine.
I just followed the instructions on the pack for defrosting and kneading the pastry, then divided it into large circles, popped a pile of the filling on top and folded it over like so:
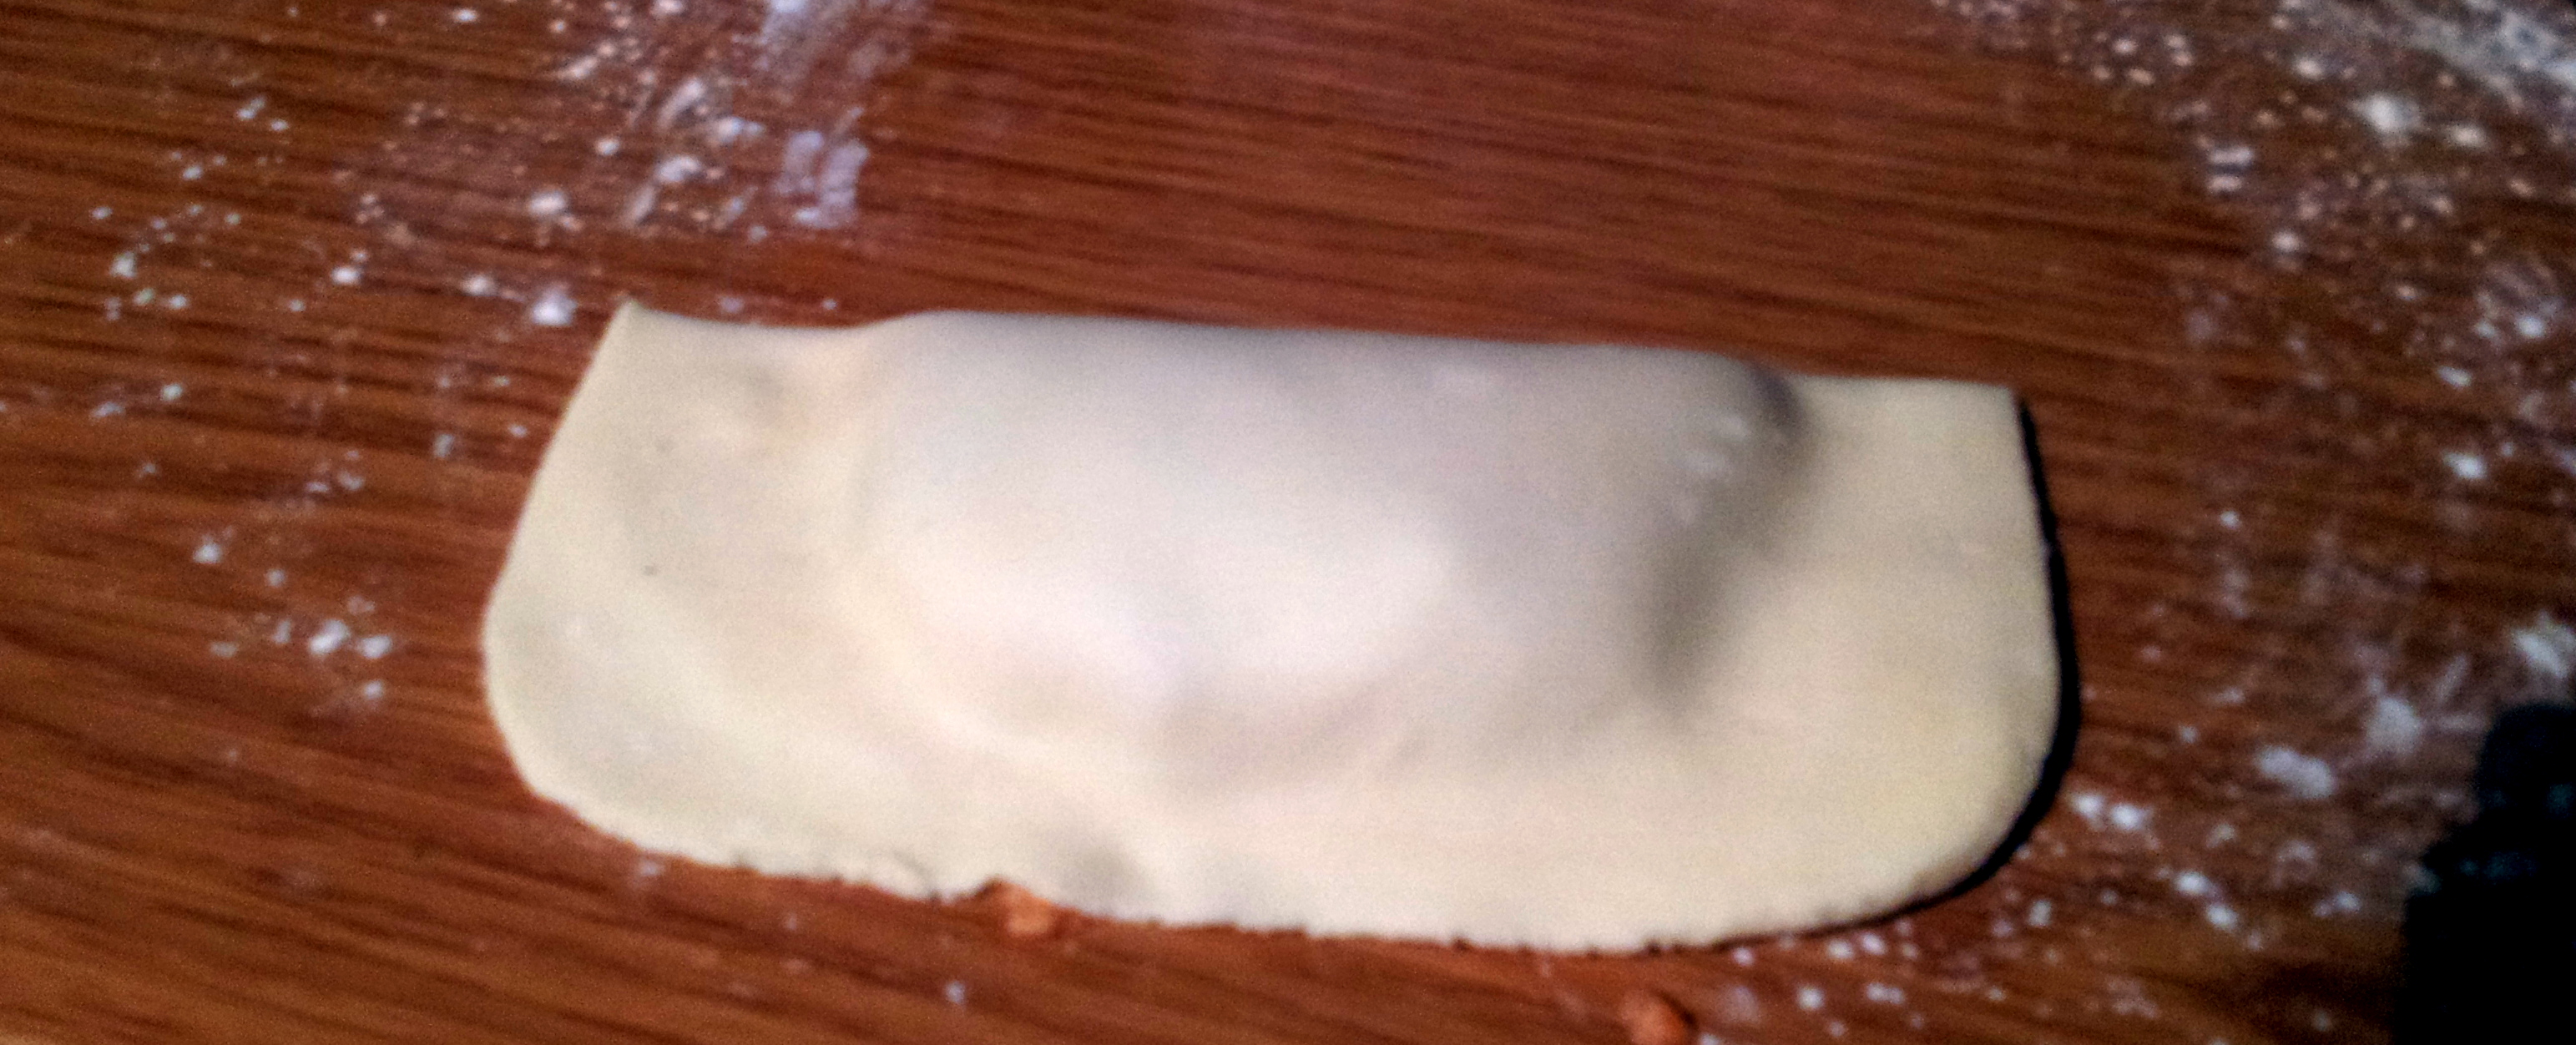
I love how the little parcels look at this stage – bulging with promise! After trimming off the excess pastry and sealing the edges by pressing down with a fork, I put them on baking trays. NB: In one of the later photos you will see that I covered the trays with baking parchment but this was a bad idea as the pasties welded themselves to it while cooking. I’m definitely putting them straight onto the baking tray next time.
Next I started cutting out the letters. You have to take it easy at this stage, making sure the pastry isn’t too thin, and poking the letters out of the cutters gently with a knife or equivalent pointy thing when it gets stuck:

Next brush milk or beaten egg over each pasty and then arrange the letters on top. Brush the letters with the milk/egg too, and then cook for 15-20 minutes at 220°C/fan 200°C/gas 7.

And here is the final result:
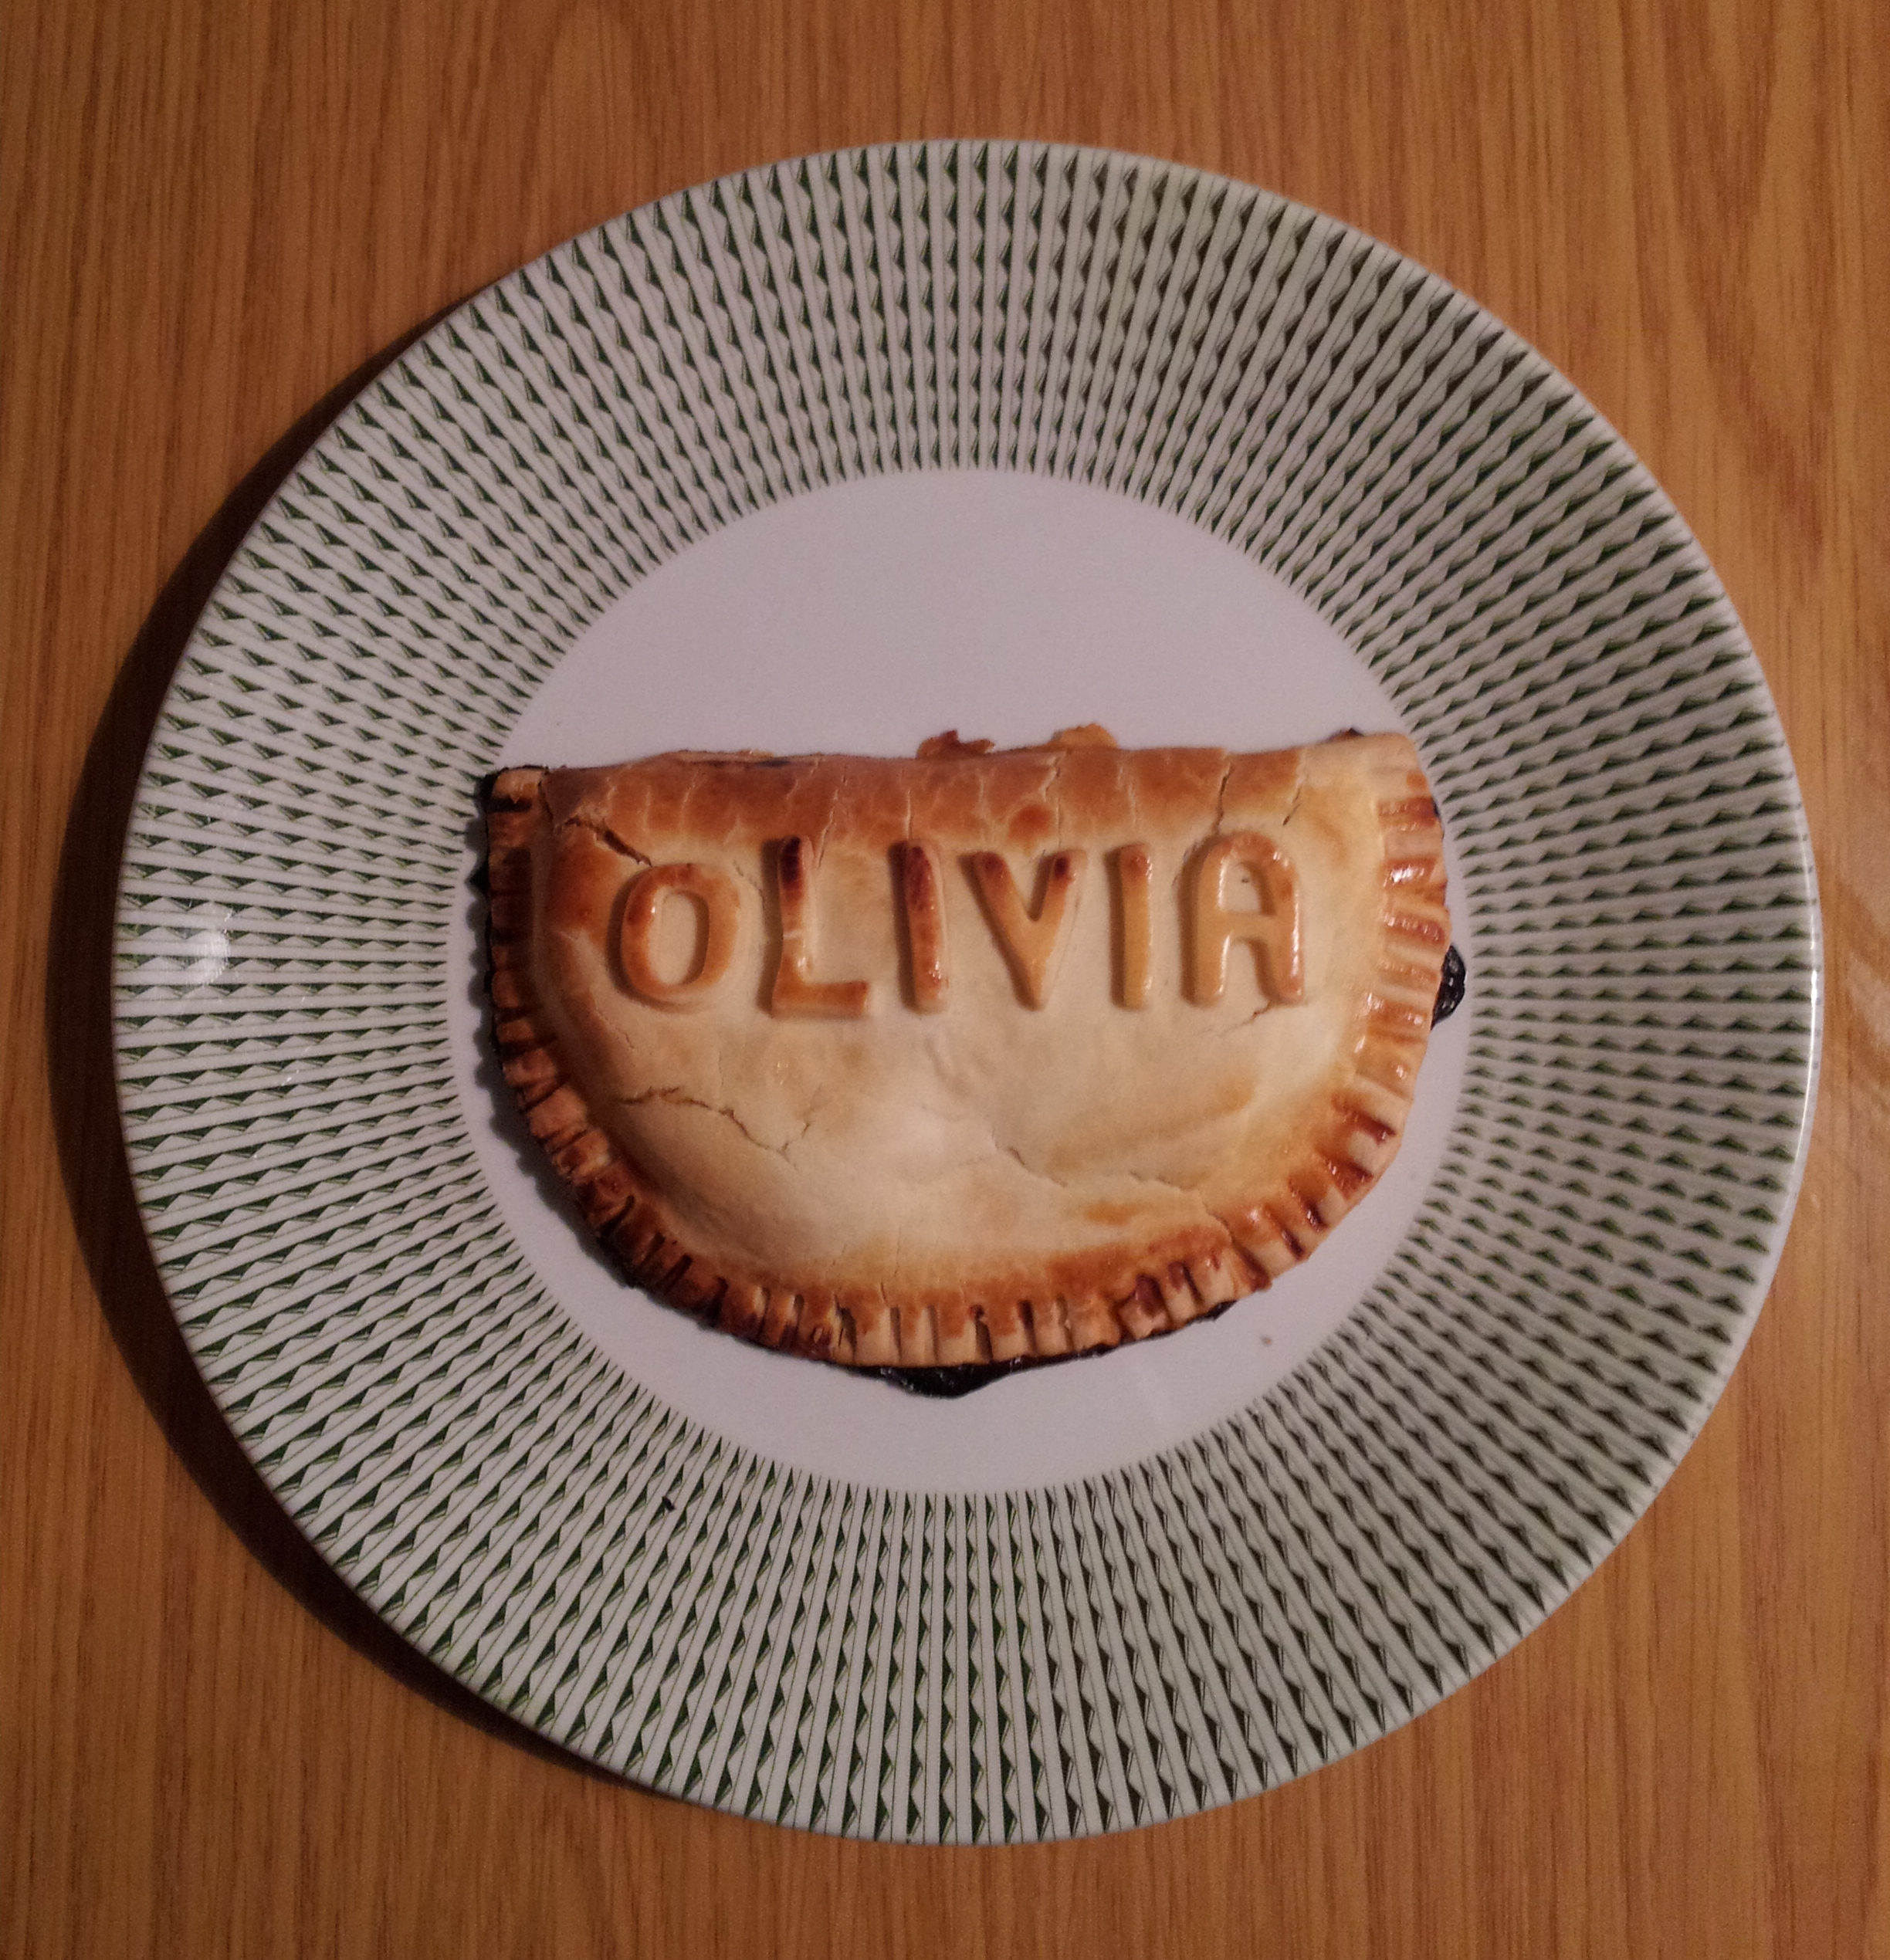
I served them up with fresh salad and they went down a treat. Chloe liked the letters so much she ate them separately.

Thanks to pasty recipients Amy, Jemima, Chrissy, Emma and Olivia (and of course Chloe) without whom I wouldn’t have had the pleasure of devising this tutorial!
Printed tea towels tutorial
Posted: 1 April 2013 Filed under: Handmade | Tags: custom printing, family recipe, Mothers Day, Tea towels Leave a comment
I got the idea of printing recipes onto tea towels from this tutorial, where Emma Jeffery from Hello Beautiful makes up some gorgeous linen ones printed with her grandmother’s handwritten recipes. I knew I wanted to make some for my mum for Mother’s Day but what to put on them?
I don’t recall any specific handwritten recipes from my childhood. What I do remember is hearty vegetable and wholefoods based meals, yummy puddings and treats, and my mum’s resourcefulness and confidence in the kitchen (“We don’t have half of the ingredients? Never mind, chuck some of this in instead!”) We have eaten many great dishes…and a few not so successful ones. Like the legendary baked bean lasagne from the F-Plan diet book – layers of baked beans and wholewheat pasta, topped with cottage cheese and an innovative addition from Mum, a crushed packet of ready salted crisps sprinkled over for textural diversity.
I also remember the bad behaviour of my brothers and I at mealtimes, that in recollection variably makes mum laugh or shudder, (e.g. me flicking peas across the table with my fork at a restaurant, and my brothers twirling spaghetti lassoes to impress my friend Andrea). It struck me that these are the meals that we all remember and laugh about now, these are the treasured memories.*
So I set to work – I found the bean lasagne recipe, and also mocked up a recipe for spaghetti bolognese (cowboy style!) After scanning the images and doing some minor jiggery-pokery to them, I sent them off to be printed onto fabric and sewn up. The finished tea towels arrived less than 2 weeks later, and I’m thrilled with them!
If you would like to print a tea towel with a recipe, or any other scanned image or text, read on for the tutorial.
NB: please note that I had never used any of the following picture editing software before so if you haven’t either, don’t worry. All the software I used was free – follow the links to download it. If you’re experienced in image manipulation then you may will almost definitely know easier ways to do it – please add your advice and tips in the comments below!

The first thing to do is decide who is going to print your fabric – to search online, just google “print custom fabric”. Spoonflower has a gorgeous website and excellent customer reviews, but as I had time restrictions I needed a UK service and decided on The Fabric Press.
Once you’ve decided on a service, carefully check their requirements for submitting artwork. The Fabric Press tea towel printing page asks for the artwork dimensions to be 49cm x 70cm with a 1.5cm seam allowance, with image resolution at 140-220 dpi. (If you’re going “huh?”, don’t worry, so was I!)
Scan your image as a .jpg or .tiff file at a high resolution. (In your scanner settings, there should be .jpg and .tiff options under “file type”, and different dpi options under “resolution”). I tried 1200 dpi but it was taking soooooooo long that I cancelled and settled for 600 dpi, which was fine. NB: I mocked up the spaghetti recipe in a Word document, printed it and then scanned the printout.

If your text goes over more than 1 page then you will need to scan each and then combine the 2 scans together. I did this with the lasagne recipe, using the programme GIMP, and following this video tutorial.
Open your image in Picasa. If it’s a bit wonky,use the “straighten” tool.
Use “crop photo” to crop the picture to 49cm x 70cm. As Picasa’s options are in imperial measurements, you want a custom size of 1929 x 2755. Remember to leave enough a border of at least 1.5cm around your actual image, or it will disappear into the seam when The Fabric Press sew it up! I used the 1:1 view on the bottom toolbar to check the margins looked large enough.
Clear away any blotchy bits using “retouch”. Save.
I left it at that for the editing but there are loads of other options in Picasa so its worth having a play.
Finally I opened the image in Paint.NET to check the final size and dpi (it is quite possible this step isn’t necessary – if you know, please advise!) Go to Image, then Resize, then make sure the Print size is 49cm x 70cm. To check the dpi, select pixels/inch under Resolution in the same menu. My image had 96 dpi; less than hoped but when I checked it by going to View, then Actual Size, it looked fine. Save.
I then sent the images to The Fabric Press via the upload service and within 24hrs they’d sent me a preview. Once I’d OK-ed the preview, they sent the finished tea towels well within the expected delivery time of 10-14 days.
*OK, if I’m honest Mum and Dad don’t really laugh about the pea flicking incident, but I was over 18 when that happened (and Granny had taken us out for lunch) so I really should have known better! :-S
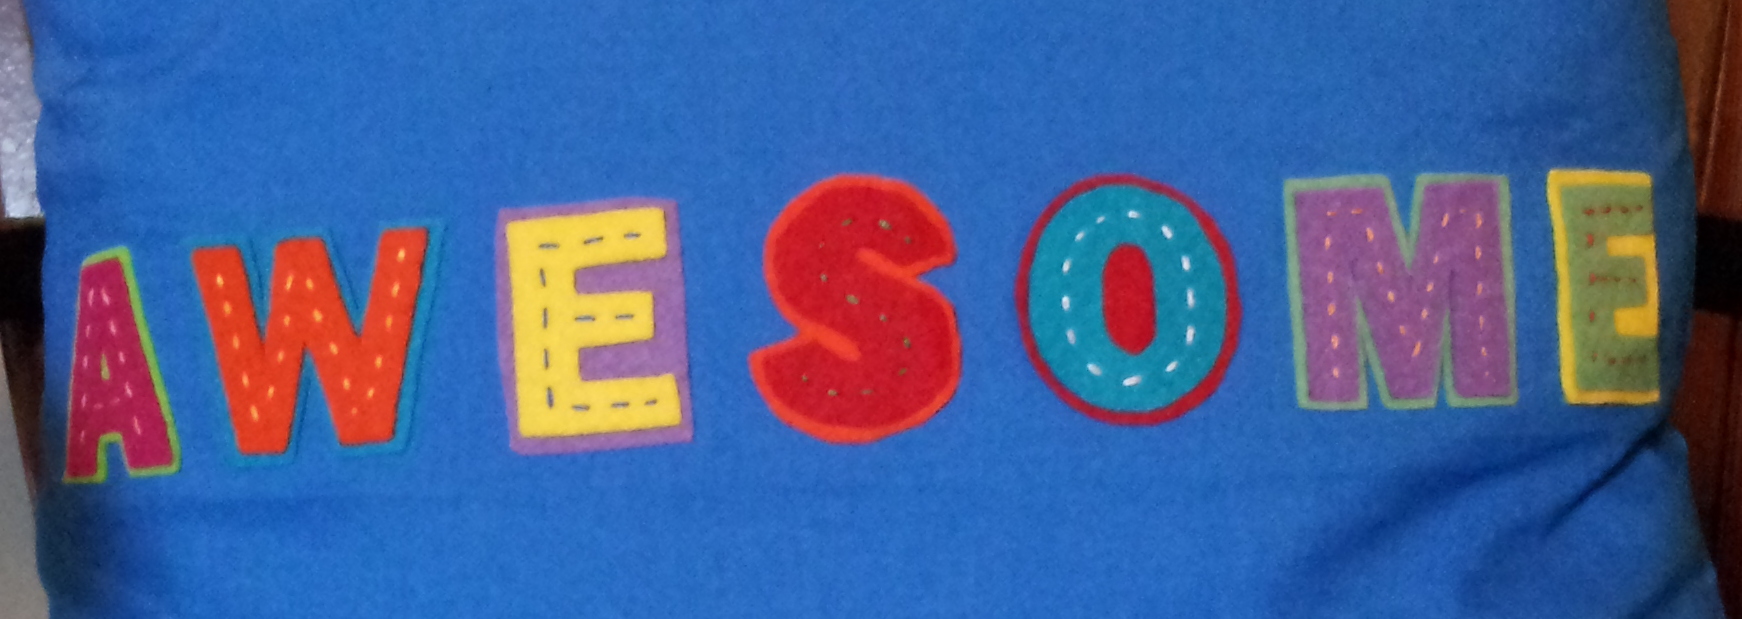
Cool and awesome cushion tutorial
Posted: 23 March 2013 Filed under: Handmade | Tags: Alexandra Ferguson, cushion tutorial, felt 2 CommentsUsually at Christmas my immediate family tell each other what they’d like for a present. I have no beef with this; my loved ones get something that they really, really want, and I get something I really, really want, it’s all good. However, as an increasingly obsessive crafter I love the opportunity to make stuff for my family, so when my brother Chris gave me the go ahead to make his Christmas present there was much air punching and excitement at the Swizzle residence.
I wanted something meaningful and fun, and after seeing Alexandra Ferguson’s “sassy little pillow company” on Etsy I loved the idea of a sloganned cushion. It didn’t take long to work out what they would say: in the very early days of my pregnancy with Chloe, Chris informed me that upon her arrival he would henceforth be known as Cool Uncle Chris and it soon followed that his then girlfriend would be Awesome Auntie Amy. Job done.

To make your own cushion, you will need:
- 3 pieces of plain fabric as follows: piece A: 53 x 53cm; piece B: 53 x 27.5cm; piece C: 53 x 42.5cm. Measurements include a 1.5cm seam allowance.
- 50cm x 50cm cushion inner
- Sheets of coloured felt
- Bondaweb (1/2 metre should be more than enough)
- 3 buttons
- Embroidery thread and needle
- Sewing machine and thread
- Pencil, fabric pencil, scissors
- Access to a computer and printer for printing off letter templates
Method:
Using Microsoft Word, write your chosen slogan, choose your font, and increase the size. The letter need to be big enough to spread across the finished 50cm cushion, but make sure you leave enough space for each letter to have a contrasting border. I used Franklin Gothic Heavy, sized up to 200.
Print and cut out letters:

Turn letters print-side-down onto the paper side of the Bondaweb. Trace them:

Cut each letter out roughly, then one by one, put the rough side of a letter onto a piece of coloured felt and iron it for 5 seconds using dry heat. Cut letter out accurately:

Peel off backing paper and place each letter onto a contrasting colour felt. One by one, cover each letter with a damp cloth and iron for 10 seconds, pressing down lightly. Lay flat and cool for 20 minutes, then cut around each letter leaving a border of approx 0.25cm.

Turn bordered letters upside down and place on paper side of Bondaweb. Trace, and cut out roughly. Match each piece of Bondaweb with its corresponding bordered letter and iron the rough side onto the back for 5 seconds with dry heat.
Arrange bordered letters onto fabric piece A, making sure they don’t overlap into 1.5cm seam allowance. One by one, unpeel backing paper of each letter, cover it with a damp cloth and iron for 10 seconds, pressing down lightly. Lay flat and cool for 20 minutes.

Crack out the embroidery thread and do a contrast running stitch in each letter:
Now its time to make the cushion. Starting with fabric piece B, fold up 3cm on the longer side and press. Then fold up another 3cm and press. This is your button placket! Sew along upper edge:

Repeat with fabric piece C, but this time fold down the fabric:

Place fabric piece B on top of piece A, with right sides facing, and pin. NB: the folded over fabric that makes the placket should be on top:

Place piece C on top, with folded fabric on top, and pin. Button plackets should overlap:

Sew cushion edges with 1.5cm seam:

Trim seams as necessary then turn right side out – nearly done! Space buttons evenly along button placket and mark where buttonholes need to be. Make buttonholes in top layer using sewing machine (see machine’s manual for instructions):

Mark button positions on bottom layer of placket by marking with fabric pencil through button holes. Sew buttons on:

As we say in the West Country, jobs a good ‘un!

PS: I was going to apologise for the slightly dodgy illustrations (I forgot to take photos of the whole process) but actually I kind of like including a few of them, they go with the whole DIY aesthetic and are probably clearer than some of my photos anyway :-S What do you think?
Hello 2013…sorry I’m late!
Posted: 23 March 2013 Filed under: Handmade, Homemade | Tags: butterfly cakes, Christmas stockings, cushions, Das clay, nativity costume 2 CommentsWow, its almost the end of March already, how did that happen?
So, back in November when I signed off for a while I promised that when I returned I’d tell you what I’d been up to. Here are a few highlights of our festive crafting…
My absolute favourite craft project of Nov/Dec was making Chloe’s first nativity costume. Using this tutorial as the basis, I made her outfit from one of my Nanna’s old bedsheets and some fake sheepskin material, while watching It’s a Wonderful Life, drinking Baileys, and getting all nostalgic for the costumes my mum used to make for me:

We also made our first ever butterfly cakes to gobble while watching the unbelievably cheesy Christmas film Santa Buddies. I used the same Nigella recipe as in the rainbow cupcakes we made last year, without the food colouring, obvs :

At Chloe’s Grannie Jude’s house I helped her and Hazel make felt Christmas stockings (including one for Chloe’s Big Teddy):

Chloe made a clay handprint for her Dad using Das air drying clay. I’d never used Das before but would recommend it as it’s cheap, supereasy to use, and you can even paint or varnish it afterwards if you want. I even quite like the smell (paint fumes and Amaretto – mmm):

And finally, I made cushions for my brother Chris and sister-in-law Amy. Tutorial coming soon!:
Grandpa
Posted: 12 December 2012 Filed under: Handmade, Other creative shenanigans | Tags: dolls house, marquetry, woodwork 3 Comments
Last month my Grandpa passed away. After battling a heart attack, several mini strokes, and vascular dementia over the past couple of years it was not unexpected, but the loss has been deeply felt.
Grandpa was a wonderful man. Loving, practical and loyal, he was also very funny. My brothers and I recently spent a lovely evening sharing our memories of him singing us silly songs, wearing his hat back to front (as above), getting down on his hands and knees to play games with us, and generally making us feel happy.
He was also a talented craftsman. After serving in the Second World War, he worked for 50 years as a cabinet maker and sewing machine repair man. In his spare time he enjoyed photography, calligraphy, and all kinds of woodwork.
Grandpa was very family focused, and the things he made reflect that. My Nanna’s house contains many things he made for them, including tables, a barometer and a clock. On the shelves and tables in the sitting room there are bowls and figures that they made at the wood carving classes that they enjoyed together. He also enjoyed marquetry, and my brothers and I remember gazing in wonder at some of his pictures when we were little:

He also shared his skills with us. When my brothers each went to stay with my Nanna and Grandpa over the summer, they came back clutching a something that they’d worked on with him throughout the week – their projects include a wooden spoon, a draughts board, a baseball bat, and a clock in the shape of a football shirt.
He and Nanna also started a tradition of making a small decorative gift every Christmas, such as a cat pencil holder, or an elephant ornament (see gallery below). I would then place an order with them, and they would produce enough for me to give to each of my friends, who loved them. Even by the age of 17 I can still remember friends asking me what the Nanna and Grandpa present would be that year, and thoughout University I had a windowsill full of their final Christmas project, wooden flowers:

Throughout our childhood, all three of us received wonderful presents which Grandpa had made – solitaire boards, a clock, music boxes and a beautiful dark wooden boomerang (which sadly did not come back and was lost somewhere at Burnham-on-Sea!)
My most valued of these presents is the dolls house that he and Nanna built together, to replace the more basic one they’d made me when I was younger. They spent years on it and the craftsmanship is incredible; from the working lights and the sash windows which really open, to the beautiful needlepoint rugs and the parquet flooring in the library (the latter was made from countless tiny pieces of veneer, all joined together). It is truly a work of art and I am really looking forward to Chloe being old enough to appreciate and enjoy it.

When I think of Grandpa, I don’t immediately recall all the things that he made. I think of his nature – warm, silly, resourceful, kind. But this is what I see when I see the things he created. I see it in the lightshades of the dolls house – made variously from plastic balls cut in half, those one-portion pots of milk you get in cafes, and the flower shaped heads of birthday cake candle holders. I see it in the smiling, cross-eyed cat pencil holder. I see it in the love and care that he put into the things that he made for all of us.
I hope you enjoy the pictures below – just a small selection of his handiwork.
And for everything you made, for everything you did for us, and for being such a good man…thank you Grandpa.


Autumn baking
Posted: 8 November 2012 Filed under: Homemade | Tags: cake, Emma Goss-Custard, Harry Eastwood, Honeybuns, Red Velvet and Chocolate Heartache 5 Comments
I was recently the grateful recipient of a fab new recipe book – Honeybuns gluten-free baking by the improbably named Emma Goss-Custard.
I first tried a Honeybuns cake many years ago in a cosy cafe called Beanscene in Glasgow, while visiting my friend Katie. It was the 5th November and we had stopped off on our journey back to the airport. Outside the air was crisp and we could hear the first fireworks of the night going off. The cake in question was a chocolate brownie and it was so delicious that I can still remember the experience in detail, including where we were sitting as I ate it, and how I squirrelled away the wrapper in my bag so as not to forget who it was made by.
Since then I’ve enjoyed many more of their fine recipes – most memorably with Lorraine at Glastonbury 2011 when we stopped off at their stall every day for afternoon tea. What makes Honeybuns so awesome is that they really go the extra mile to make each treat extra-special in both taste and texture – for example the aforementioned brownie contains ground coffee and has a generous sprinkling of chubby milk chocolate drops on top, and their Snowy Hills bar is an innovative combo of ginger and polenta shortbread with a lemon sponge topping.

The book contains recipes for many of their products and more, so I was desperate to get in the kitchen and start making some. Some of the ingredients were a bit tricky to get hold of (the shop assistant in Tescos was baffled when I asked for dulche de leche) but I got there in the end and here are the results. Above, we have Spicy cat cookies with oats, stem ginger and raisins. These tasted pretty good, especially with the ground linseed adding a nutty edge, but next time I’ll add the raisins and chopped up stem ginger by hand after I’ve mixed the rest of the ingredients in the food processor, to add a bit more textural diversity.
Below is Squillionaires Shortbread. I was blown away by this one. I’ve long admired the Honeybuns shortbread recipe, rich with butter, polenta and ground nuts, but to be able to make it in my own home, topped with caramel and thick chocolate was a personal triumph. I will definitely be coming back to this book again – thank you Emma Johnson-Custard for the great birthday present!

In addition to the above, I have also had cause to turn to my ever faithful copy of Red Velvet and Chocolate Heartache by Harry Eastwood. I baked a Coffee and Walnut Courage Cake for a local centre for homeless and vulnerable people as part of Make a Difference Day, an annual event run by the volunteering and learning charity CSV. I couldn’t let it go without a little taster so scraped a bit off the top of one of the layers and it was moist and comforting, and the icing was divine.

And with that I’m signing off for a month or two to focus on making a few Christmas presents, and to work on a new project which has already kept me up into the wee small hours practicing new techniques and sketching out different designs. I’m sure I’ll be posting about all of it in the new year 🙂
